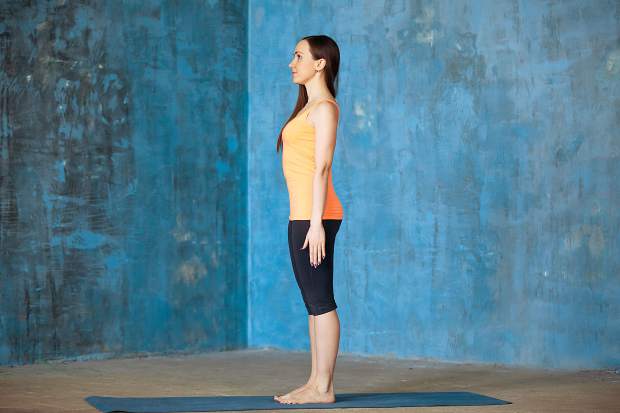
Mountain Pose - Tadasana- Information
Tadasana is a standing pose
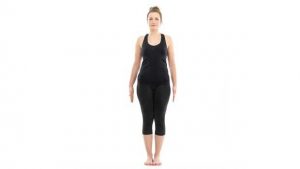
Tadasana is the fundamental, basic standing position from which we can uncover the foundations of all of the standing postures. It is not only a posture of great importance in it's own right but a starting posture for many yoga sequences such as surya namaskar, a super rest position and it is just amazing at improving your posture.
All asana practice teaches us qualities and skills that we can take off the yoga mat and apply to our day to day life. Tada is sanskrit for mountain. Tadasana, mountain posture, invites us to develop the qualities of a mountain within us; the ability to stand centred in our being and to respond to life from a solid and centred awareness. Tadasana encourages us to find the stillness, strength, power and stability of a mountain within our own being. With practice, we become increasingly skilled at standing steadfast and firm with our feet fully grounded upon the earth.
 Tadasana is the foundational posture from which all standing asanas and inversions such as headstand and handstand are born. Once the principles of Tadasana are known they can be applied to all standing asana to establish and maintain neutral alignment for these other postures simply by applying intentional shifts in specific joints or parts of the body, while the other areas of the body maintain its neutrality and foundation.
With regard to our posture it’s a well known fact that many of us adopt habitual anomalies in the way we hold ourselves with resultant aches, pains, limitations and debilities often ensuing over time. Many of us spend days hunched over a computer, standing in queues (most probably not in Tadasana), sitting in chairs, slouching on the sofa, looking at mobile devices all of which have the possibility to create constrictions and tensions in the body. Physical issues that can leave us feeling depleted and tired and not at our best. In fact in my years of teaching yoga I have found that one of the primary reasons that people come to yoga is to correct such imbalances in the body. Poor posture can cause a plethora of problems in the body which can create tension and even pain and restricted movements; problems including knee problems, back problems, sciatica, muscular tension, headaches…the list goes on.
Tadasana is a wonderful asana to assist us in correcting habitual imbalances in the way we stand and support ourselves and helps to restore an optimum posture by bringing the musculo-skeletal system more closely to its neutral alignment. This can have incredible impact on the way we hold ourselves and not just physically either. Notice how when you hold yourself better your overall mood, self esteem and confidence increase. Our general health improves dramatically. Not bad for a posture that from the outside can look like just like standing. Whilst we are externally still in Tadasana, we bring the posture alive with the breath, each breath dynamic and alive, drinking in the gift of life. So whilst it takes skill and practice to stand up properly requiring changing habitual patterns of alignment in the body the payoffs of practicing this posture are huge. I highly recommend an expedition up this particular mountain; it is well worth the climb and you never know how much you will discover! Mastering Tadasana takes us far in mastering all standing poses and it also takes us far into mastering life by literally enabling us to comfortably stand on our own two feet with grace and poise and an ease of being.
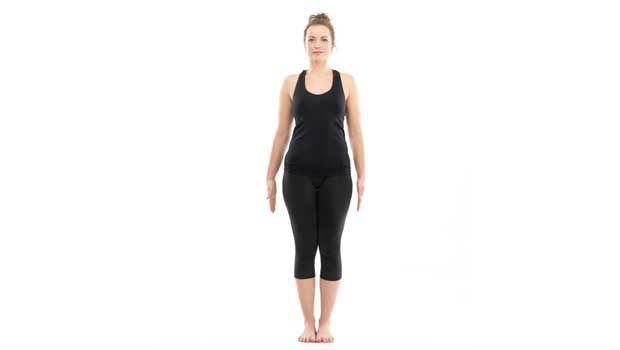
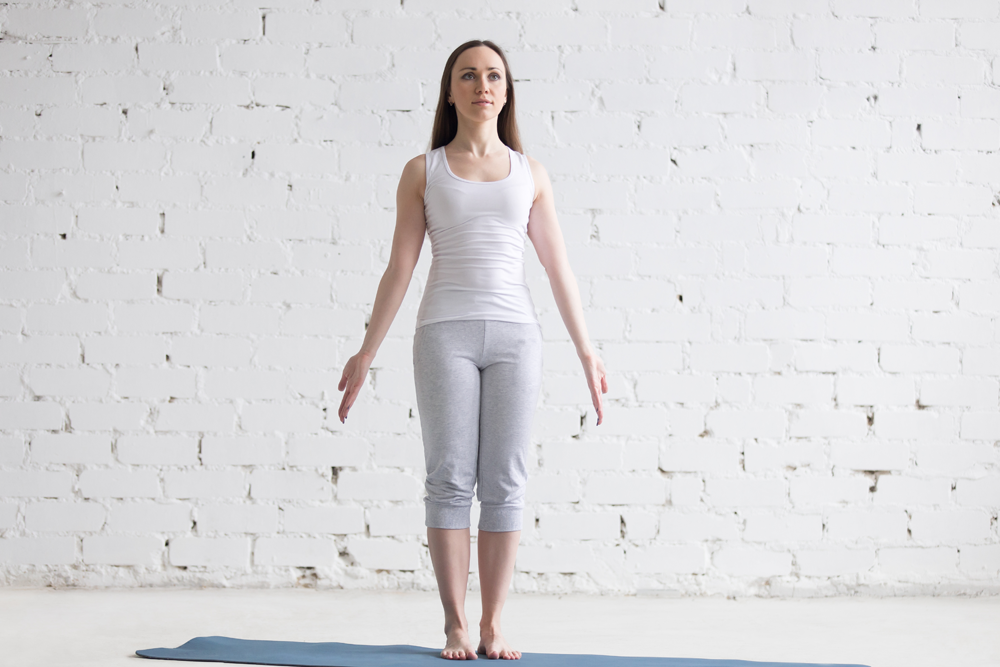
Instructions Mountain Pose- Tadasana Step by Step
Step 1-Feet
Stand with the feet hip width apart with the outside edges of the feet paralell.
Lift and spread the toes, lift the heel and extend it backwards. Spread the feet to establish maximum contact with the floor.
Distribute the weight of the body evenly through all four corners of the feet (it can help to sway forwards and backwards a little when you are learning the pose and gradually lessen the movement until you find the point of equilibrium between the two)
Distribute the weight of the body evenly through the feet; front to back & side to side .
Ground downwards through the feet.
Step 2- legs and lower body
Align the centre of the ankle with the centre of the knee and hip bone.
Lift the inner ankles to lift the arches of the feet.
Hug the muscles of the legs towards the bones of the legs, without locking the knee.
The thighs are drawn thighs up and back, engaging the quadriceps.
Rotate your thighs slightly inwardswidening your sit bones
Get a sense of energy extending upwards from the feet towards the pelvis with the hips bones pointing straight ahead.
Ensure that the knees face directly ahead keeping the knee joint stable and safe. Adjust the feet slightly if necessary to allow this.
Allow the pelvis to be in it’s neutral position.
Lengthen the tailbone towards the floor and lift the pubic bone towards the navel.
Step 3- upper body
Extend upwards from the pelvis to the crown of the head.
Lengthen through the spine. Use the breath to create space. Witheach inhalation discover more space in the body, each exhalation release tension allowing the spine to extend further.
Find the place where you can feel the spine elongated and long whilst retaining a sense of relaxation in the whole body.
Create space between the navel and sternum and the sternum to the crown of the head keeping the lower ribs drawn in.
Lengthen the sides of the body.
Step 4- shoulders and arms
Take your shoulders back and allow the shoulder blades to widen and release down the back towards the hips releasing any tension in the shoulders and upper back.
As the shoulders relax, the head and neck can extend, and lengthen.
Allow the arms to release beside the body, palms facing towards the legs and fingers extended pointing towards the floor
Draw the chin in slightly so the underside of the chin is parallel to the floor, keep the back of the neck long and extended and in its natural alignment with the spine.
Aim to have your ears, shoulders, hips, and ankles in one straight line
The Dristhi gaze point is forward. The gaze is soft.
Widen the collarbones, keep the heart lifted and the chest open
Step 5- refining the pose
Release the jaw allowing the jaws to be slightly parted. This is often a place of held tension so notice if by relaxing the jaw you notice tension release in other parts of the body too.
Notice the breath. Notice how inhalation initiates a desire to lengthen and extend, the exhalation a desire to let go. Feel the energy lifting upwards from the feet to the crown of the head with each inhalation.
To encourage creating length in the spine, engagement of the core and opening in the chest you can place one hand onto the abdomen and the other onto the centre of the back.
To encourage length in the spine, place a hand onto the top of your head and rise towards the hand.
To encourage opening of the chest, place the hands under the armpits and breathe into the hands.
Benefits
Physical
- Improves posture
- Aligns the spine
- Improves balance and core strength.
- Tones the abdominal muscles
- Tones the glutes
- Strengthens the arches, feet, ankles, knees and legs.
- Tones the muscles of the legs.
- Opens the hips, chest, back and shoulders.
- Relieves sciatica and lower back problems
- Reduces flat feet
Mental
- • Builds focus, concentration and will power
- • Develops ability to balance
- • Calms the mind
- • Relieves stress and mild anxiety
Contraindications
- If you have any condition that affects balance, such as low blood pressure headaches, or inner ear problems it may be beneficial to practice this asana against a wall.
- People with MS or recovering from stroke may find balance challenging
- If pregnant hold only for as long as is comfortable.
Variations
 You can stand with the feet just in front of a wall. As your posture over time develops your heels, sacrum and shoulder blades will touch the wall
- Raise the arms upwards, shoulder width apart with the palms of the hands facing each other.
- Open palms outwards
- Interlock the palms of the hands and extend the arms upwards
- Bring hands in front of the heart in anjali mudra.
To progress the posture
 Have the big toes touching, heels slightly apart so that the second toes are parallel.
- Close you eyes. This a great way for the body to find its equilibrium without using visual cues.
- Take Tadasana into your day. You can practice Mountain Pose many times throughout your day: You can practice standing in queues , brushing your teeth, washing up, ironing, walking, in the gym etc. Once you get familiar with the posture, you may find that you hold yourself better throughout your day and experience more comfort, energy and a calm, focused mind